Add Claim Form
To add new claim form click  on the Tab Claim Form page and the Add page will appear as the following image:
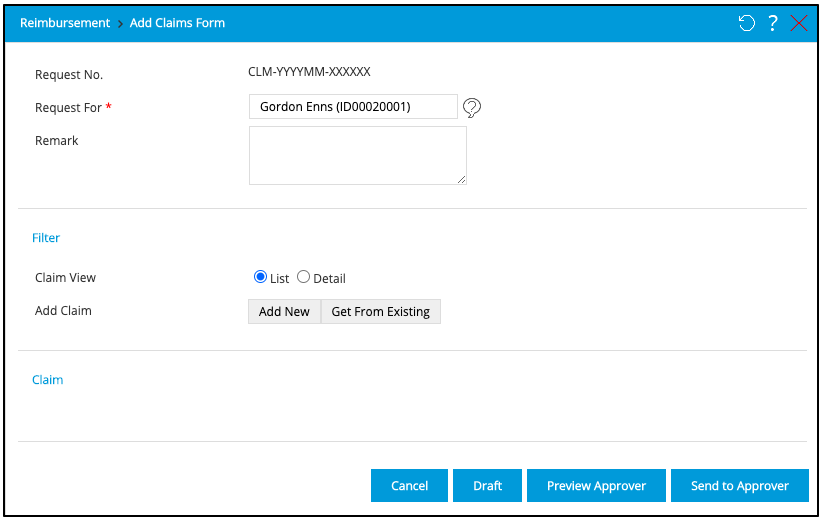
Follow these steps to complete the information:
- Request Number: This number is created in Setting > System Setting > Template Management > Document Number Configuration.
- Request for: Set for whom the claim is given to by clicking the suggestion tip button
 .
. - Remark: Type additional information related to this claim form on this field.
- Filter: In this section, there are fields you have to determine.

- Claim View: Choose whether you want to display the claim form in the list or in detail on the last section.
- Add Claim: Choose ‘Add New’ to create a new claim or choose ‘Get From Existing” to get the claim form the existing claims. If you choose ‘Add New”, you will be directed to the new page as shown in the following picture:

- Type: Choose the claim type by clicking the dropdown button. Please note that what you choose on this step will affect which fields will appear or not on the next steps.
- Request For: Set for whom the claim is given to by clicking the dropdown button. This field only appears if you have selected the type on the previous step.
- Transaction Date: Select the transaction date by clicking calendar icon
 .
. - Misc Field: In this section, some or none of these following fields will appear, depending on the type you choose on the first step. As on the picture abpve the type of the claim is ‘Medical Claim’, the following fields will appear:
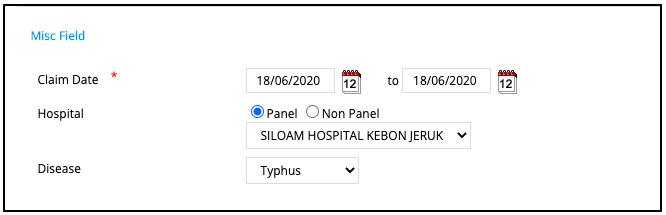
- Claim Date: Choose when did the claim starts and ends, for example, if you were hospitalised, which started on 17 June 2020 and ended 18 June 2020, click and insert those dates on the first and second button, respectively.
- Hospital: Choose whether the hospital is panel (selectable from the list created on Setting > Employee Setting > Doctor or Hospital Reference or non-panel by clicking the desired radio button. If you choose ‘Panel’, select the hospital by clicking the dropdown button. If you choose ‘Non-Panel’, type the name of the hospital .
- Disease: Choose the type of the disease which is related to this claim by clicking the dropdown button.
- Claim Date: Choose when did the claim starts and ends, for example, if you were hospitalised, which started on 17 June 2020 and ended 18 June 2020, click
- Calculation: Then, in this section, you can calculate the fee used for this claim by clicking "Calculate" button. Please note that the fields which appear here depends on the choice you made on the first step. The results will appear on "Amount" and "Valid Amount" field. Here is an example:
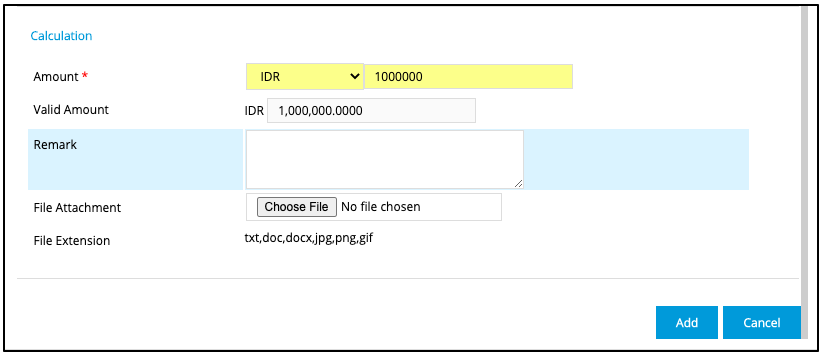
- Amount: Select the currency then type the amount you used for this claim.
- Exchange Rate: Exchange rate appears only if the currency used for this claim has exchange rate loss compensation, which can be set on Setting > Reimbursement Setting > Exchange Rate Loss Compensation. GST Rate appears only if the claim has been set to not be tax free. Please note that only authorised users allowed to set this.
- Remark: Type additional information related to this claim on this field.
- File Attachment: Attach a file related to this claim if necessary by clicking the “Choose File. Locate the file, then click “Open".
- File Extension: The file uploaded can be in the form of txt, doc, docx, jpg, png, gif.
 to add the claim to claim form and click
  if you want to cancel new claim.
If you choose ‘Get From Existing” then you will be directed to the new page as shown in the following picture: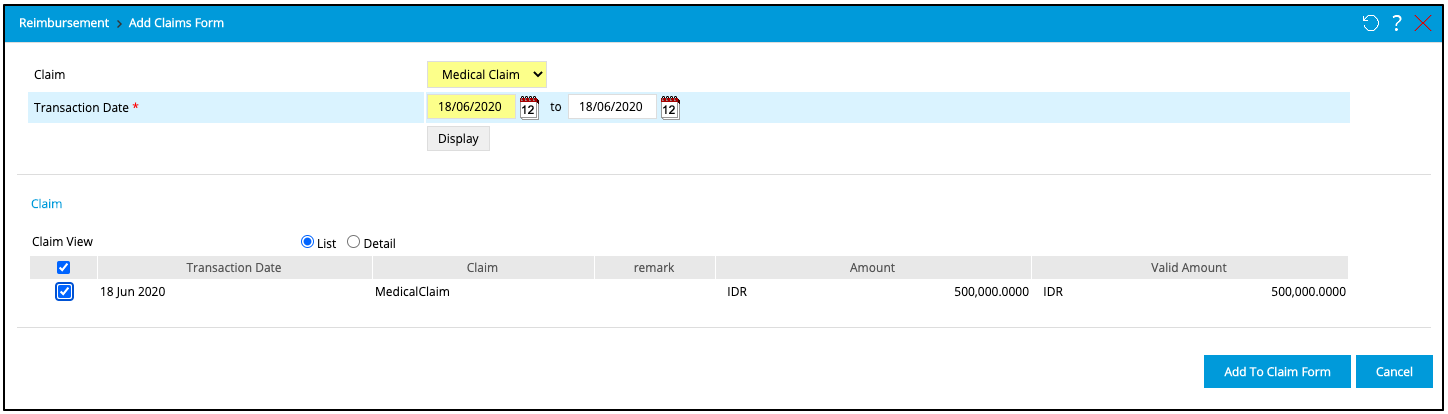
- Amount: Select the currency then type the amount you used for this claim.
- Claim: Choose the claim type by clicking the dropdown button.
- Transaction date: Select the transaction date by clicking calendar icon . Then, click ‘Display’ to display the existing claims based on the type and date chosen before.
- Claim View: Choose whether you want to display the claim form in the list or in detail.
- Select All Claim: Click the ‘Yes’ checkbox to select all claims or select the claim you desire by clicking the checkbox on each claim.

- to add the claim to claim form and click
- if you want to cancel the claim.
- Claim: In this section you will see the claims you have added by adding new or by getting from the existing claim. You can display the claim in the list or in detail based on the option you choose on the ‘Claim View’ field.
Click  to cancel the request and go back to the index page without saving the data. Click
  to save the request. Click
  to send it directly to approver. Click
  to review list and workflow of approver.
User can also view the detail request by clicking the bell icon on the top right corner of the home page, then choose Reimbursement Claimform as follow:

Then the following image will appear:

There are columns of Transaction Date, Claim, displaying the claim type, request for, which displays the information who the request is made for, if the request is made for the family members, then the information of the relation will also be displayed, Remark, Amount, GST Amount, Valid Amount, Approve Amount, and Notes.